Eyeshadows can be a game-changer when it comes to makeup. But you need to know how to apply it correctly to lift and define your eyes. You must trace the right shape, add crease color, highlight the inner eye corner, and blend it well. Check out the step-by-step illustrated tutorial in this article to amp up your eyeshadow game from novice to pro. Keep scrolling for the step-by-step eye makeup tutorial!
Keep in Mind
- Pick The Brushes: Pick The Brushes Besides the basic eyeshadow brush, consider adding an angled brush, a blending brush, and a crease brush to get the perfect eyeshadow application.
- Pick The Colors: Pick The Brushes Whatever the look, make sure you pick up 3 colors– A mid-tone lighter shade, a darker color for contouring, and the color closest to your skin tone for highlighting.
- Mirror Placement: Pick The Brushes Hold a pocket mirror below the chin level to be able to view the whole eyelid canvas while applying eye shadow. Look down at the mirror.
- Holding The Brush: Pick The Brushes Use the brush with a soft hold and try holding it near the end of the brush or in the middle. Holding it close to the tip will create harsh pigmentation on the eyelid.
In This Article

1. How To Apply Eyeshadow – Tutorial With Pictures
2. How To Apply Eyeshadow For Hooded Eyes (Video)
3. Halo Eyeshadow Looks
4. How To Choose The Right Eyeshadow
5. Quick Tips to Apply Eyeshadow Perfectly
6. Infographic: 7-Step Tutorial To Apply Eyeshadow The Right Way
7. Frequently Asked Questions
8. Key Takeaways
How To Apply Eyeshadow – Tutorial With Pictures
Eyeshadow can add a ton of depth and dimension to your eyes. The key to proper eyeshadow application lies in blending the colors well. Once you get the basics right, you can experiment with whatever look you fancy – be it smokey eye, cut crease, or glitter halo! Scroll below for a sharp eye makeup step-by-step tutorial.
What You Need
- Eyeshadow primer
- A nude eyeshadow
- Medium brown eyeshadow
- Burgundy eyeshadow
- Fluffy blending eyeshadow brush
- Brown kohl liner
- False eyelashes
- Mascara
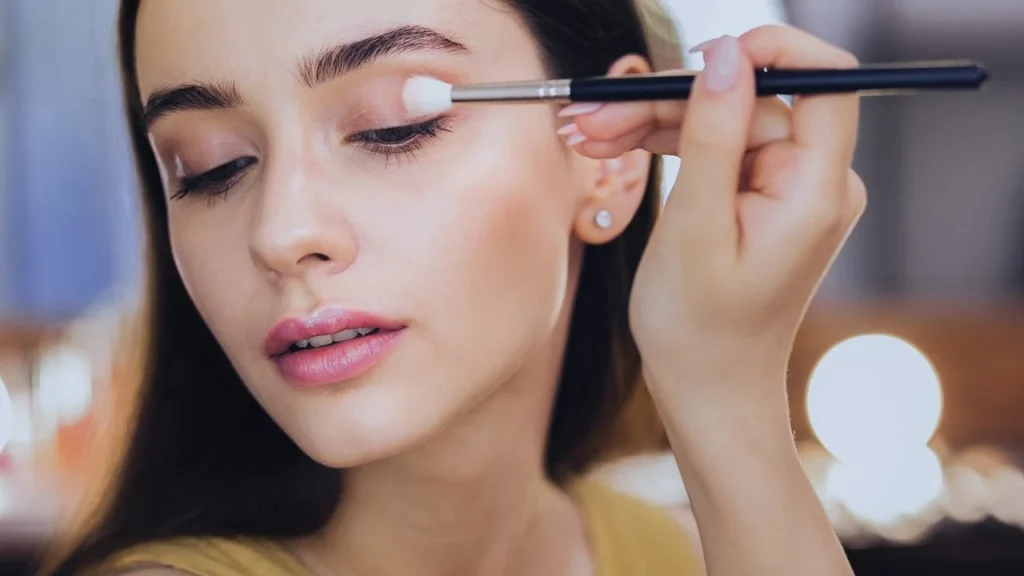
Step 1: Apply Eyeshadow Primer
Eyeshadow primer is a crucial first step to ensure your eyeshadow lasts longer, appears more vibrant, and stays crease-free. Here’s how to apply it:
Steps:
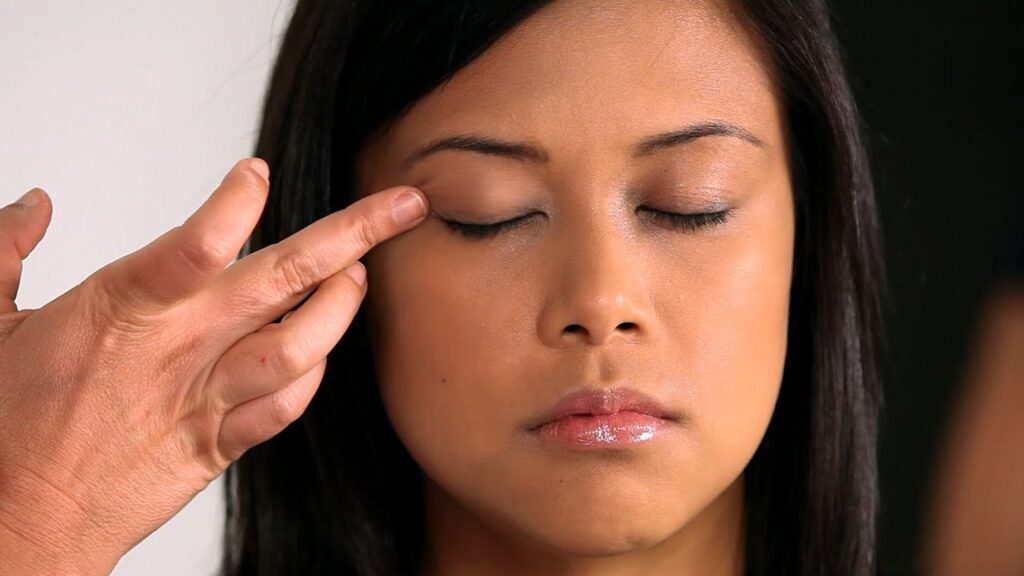
- Prep your eyelids: Make sure your eyelids are clean and dry. You can gently wipe them with a makeup remover or a gentle cleanser if necessary.
- Take a small amount: Use a pea-sized amount of eyeshadow primer on the tip of your finger or a small brush.
- Apply evenly: Gently dab the primer onto your eyelid from the lash line up to the brow bone. If you plan on applying eyeshadow under your lower lash line, add a small amount there as well.
- Blend: Use your fingertip or a soft brush to blend the primer evenly across your eyelid. Make sure it’s well-blended and smooth.
- Let it set: Wait a few seconds for the primer to set before moving on to your eyeshadow.
This will create the perfect base for your eyeshadow! Would you like to proceed with the next step?
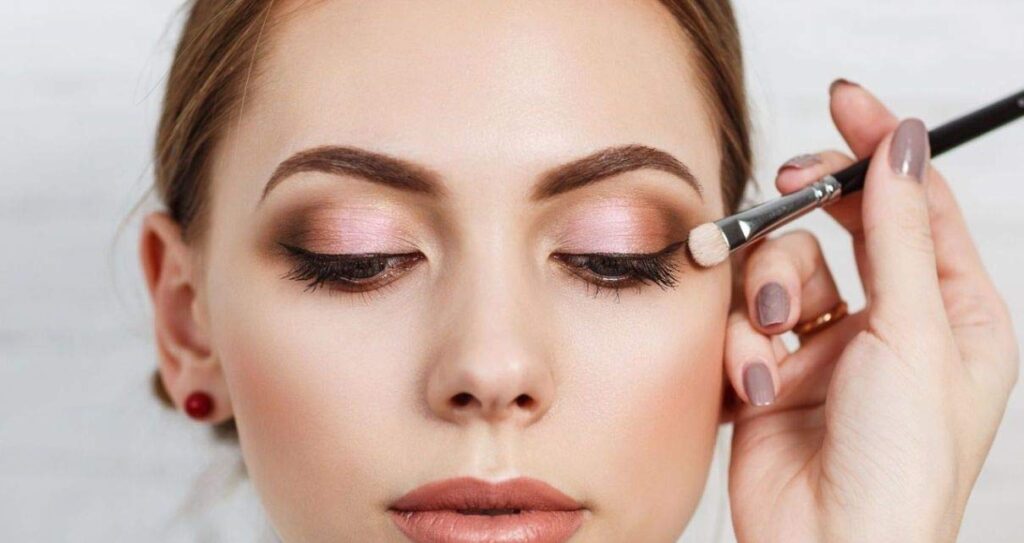
Step 2: Apply A Nude Base
Using a fluffy blending eyeshadow brush, apply a nude shadow that complements your skin tone and blend it in thoroughly. Tap some of the excess product off before applying on the eye. This step helps maximize the longevity and intensity of the colors you use in just about any look.
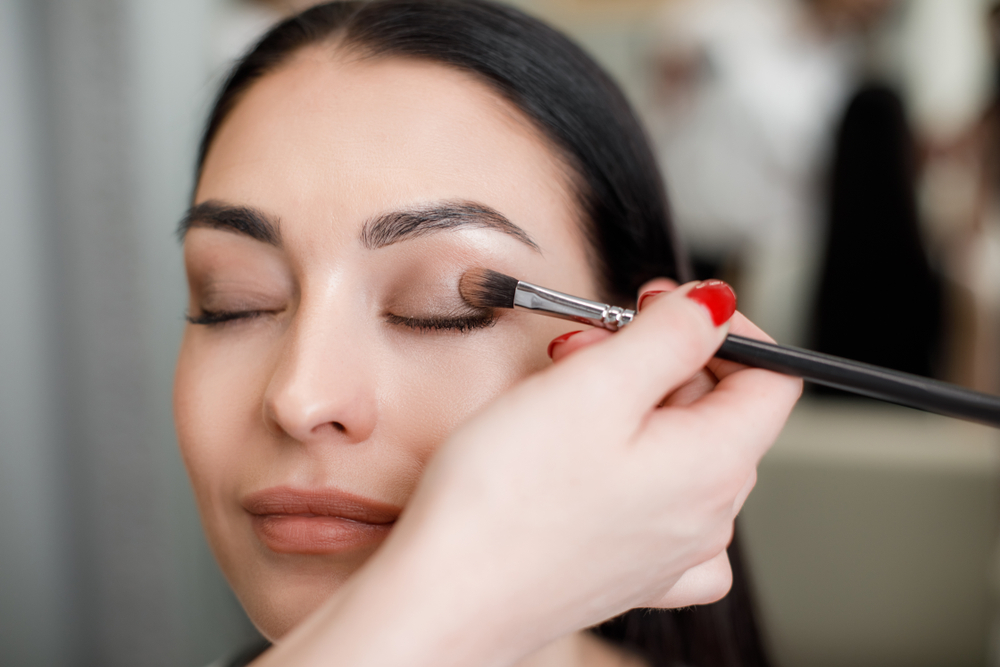
Step 3: Enhance The Crease
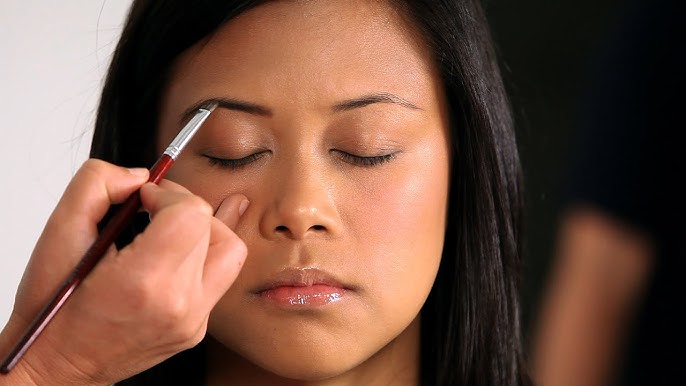
Apply a medium brown-toned eyeshadow to your crease using a fluffy blending brush. Add some color to your lower lash line and blend out the pigments well, especially towards the outer corners.
Step 4: Add Some Color
Apply a dark burgundy eyeshadow, focusing the color just on the outer corners. Gently extend it past your crease for a smokey effect. Use the same color on your lower lash line as well. A fluffy brush is your best bet to smoke out the color while blending the shadow beautifully.
Step 5: Create A Gradient
Apply the nude eyeshadow that you used in the second step to your lids. Also, use the nude shadow to blend out the edges of the burgundy eyeshadow for a softer effect.
Pro Tip: Using a nude shadow is the easiest way to make your eyeshadow look super blended and clean.
Step 6: Define Your Lower Lashline
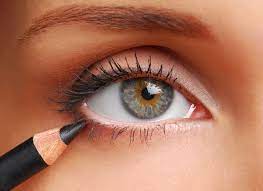
Apply brown kohl to your waterline. Make sure to really smudge it in to achieve that gorgeous smokey effect.
Step 7: Amp Up Your Lashes
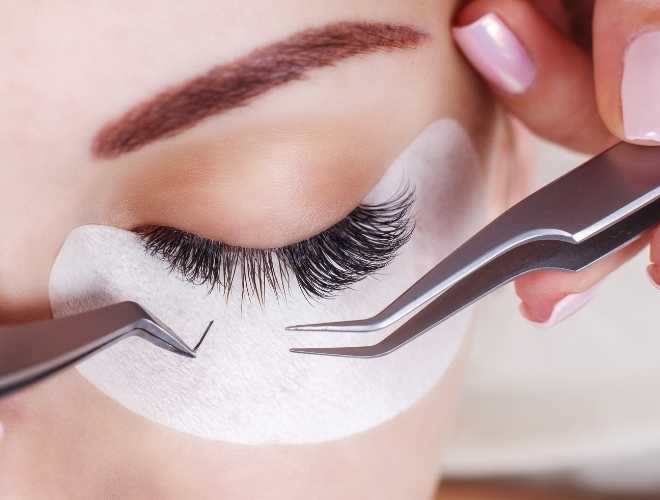
You can add a pair of falsies for a more glamorous effect. Apply a heavy coat of mascara on your lower lashes to balance the top and the bottom.
Now, bring out your other cosmetics to finish the rest of your makeup! Do your base, add some bronzer, highlighter, and nude lip color to complete the look.
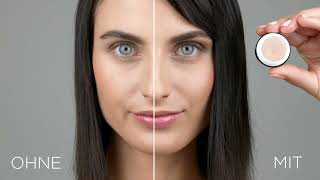
The Final Look

And that’s how to do eyeshadow on your own. Stunning, right? This simple eyeshadow application technique works for all kinds of looks – a fun and bold look, a party glitter eyeshadow look, or an everyday muted look. The only difference in the application of light and dark eyeshadows depends on your eye shape, crease, and whether you have low or high eyebrows. It also depends on your skin tone and the color of your eyes.
Molly Kauper, a blogger, shares her experience of the ideal way of applying eyeshadow as well as simple tricks she likes to follow on her personal blog. She has outlined the importance of a quality palette: “In general, I’d recommend going with a palette with like 10-20 shades, and something with a good range of lighter to darker shades.” She has also shared a tip about the base of the eyeshadow, saying, “You can start on a damp base if you want the shadows to really stick, or you can start on a dry base to allow the shadows to blend easier. I like starting on a more dry, powdery base, because the shadows will blend faster and drag less
If you have hooded eyes (the eyelids get hidden when you open your eyes), you may need to create an illusion of a larger eyelid with a higher crease. Here’s a video on how to apply eyeshadow if you have hooded eyes. Take a look!
How To Apply Eyeshadow For Hooded Eyes
Applying eyeshadow to hooded eyes requires some specific techniques to make the most of your eye shape and enhance your look. Hooded eyes have a fold of skin that partially covers the eyelid, so the goal is to make the eyes appear larger and more defined. Here’s a step-by-step guide:
1. Prep the Eyelids
- Primer: Start by applying an eyeshadow primer. This helps prevent eyeshadow from creasing, which is especially important for hooded eyes since the fold of skin can cause makeup to smudge.
- Setting Powder: Lightly dust translucent powder over the primer to create a smooth surface for blending.
2. Create the Illusion of a Higher Crease
- Transition Shade: Use a medium-tone matte eyeshadow as a transition shade. Apply it slightly above your natural crease (closer to the brow bone) to create the illusion of a higher crease. Use a fluffy blending brush and blend in windshield-wiper motions.
- Focus on Matte Shadows: Shimmer shadows can highlight the hooded area, so focus on matte shades for this step, as they give more depth.
3. Deepen the Outer Corner
- Choose a darker matte shade to define the outer corner. Apply this color to the outer “V” of the eye, blending it upwards toward the crease. This helps lift and elongate the eyes.
4. Brighten the Lid
- Use a lighter or shimmer shade on the mobile lid (the part of the lid that is visible when your eyes are open). This brings attention to the lid and opens up the eyes.
- Apply this shade from the inner corner and stop at the area where you applied the darker shadow.
5. Blend and Diffuse
- Take a clean blending brush and gently blend the shadows to ensure there are no harsh lines. Always blend upwards to avoid pulling the shadow downwards, which can make the eyes look more hooded.
6. Highlight the Brow Bone and Inner Corner
- Apply a subtle highlight shade under the brow bone and in the inner corner of your eye. This adds brightness and makes the eyes look more awake and open.
7. Tightline and Use Eyeliner Strategically
- Tightline: Apply eyeliner on your upper waterline (tightlining) to make your lashes look fuller without losing lid space.
- Eyeliner: Avoid thick eyeliner on the upper lid, as it can make hooded eyes appear smaller. If you want to use eyeliner, apply a thin line close to the lash line and slightly wing it upward at the outer corner to lift the eyes.
8. Curl Lashes and Apply Mascara
- Curling your lashes is a must for hooded eyes to open them up. Apply mascara to the top lashes to lift the eyes even more. You can also add mascara to your bottom lashes, but keep it light to avoid pulling the eye downwards.
9. Optional: False Lashes
- If you want to enhance your look even more, use false lashes that are longer in the outer corners. This adds to the eye-lifting effect.
Additional Tips:
- Avoid heavy eyeshadow on the lower lash line, as it can make the eyes look droopy. Instead, lightly apply your transition shade along the lower lash line for balance.
- Avoid too much shimmer or glitter in the crease, as it can accentuate the hood.
Would you like product recommendations for this?
Halo Eyeshadow Looks
Halo eyeshadow, also known as a spotlight eye, is a technique that enhances the center of the eyelid to create a wide-eyed, glowing effect. It’s versatile and works on most eye shapes, including hooded eyes, and can be done with neutral tones or bold colors. Here’s how to achieve a halo eyeshadow look:
1. Prep the Eyelids
- Primer: Always start with an eyeshadow primer to prevent creasing and make the colors more vibrant.
- Setting Powder: Apply a light dusting of setting powder over the primer to make blending easier.
2. Apply Transition Shade
- Use a medium-tone matte shade as a transition color. Apply it in and slightly above your crease with a fluffy blending brush. This helps to soften the edges and creates a gradient effect for the darker shades to blend into later.
3. Darken the Inner and Outer Corners
- Take a darker shade (either matte or shimmer, depending on your look) and apply it to both the inner and outer corners of your eyelid. Use a small, dense brush for precise application. Be sure to blend it slightly into the crease, leaving the center of your lid bare.
- Gradually build the color for intensity, blending in circular motions. It’s important to keep the dark color focused on the corners and slightly diffuse it into the crease.
4. Brighten the Center of the Lid
- Apply a lighter or shimmery shade directly to the center of your eyelid. This is the spotlight of the halo eye look. Use a flat brush or your fingertip for a more intense application. You can use shimmer, metallic, or even glitter depending on how bold you want the look.
- Light gold, champagne, or bright pearl tones are great for neutral halo eyes, while vibrant colors like pink, purple, or blue add drama to bold looks.
5. Blend for a Seamless Transition
- Take a clean blending brush and softly blend the edges of the dark and light shades together, ensuring there are no harsh lines. The goal is to create a smooth gradient between the dark outer corners and the bright center of the lid.
6. Add Dimension to the Lower Lash Line
- Repeat the halo effect on the lower lash line. Use the same dark color for the inner and outer corners of the lower lash line, leaving the center of the lash line bare.
- Add the same light or shimmery shade to the center of the lower lash line to mirror the effect on the upper lid.
7. Highlight the Inner Corner and Brow Bone
- Apply a subtle highlight to the inner corner of your eye and brow bone to add extra brightness. This helps the whole eye look more lifted and open.
8. Eyeliner (Optional)
- If desired, apply a thin eyeliner close to your upper lash line, or you can create a soft wing. For the halo look, avoid heavy or thick eyeliner that could overpower the spotlight effect.
- Tightline your upper lash line to define your eyes without losing lid space.
9. Finish with Mascara or Lashes
- Apply several coats of mascara to your upper and lower lashes to complete the look. If you want extra drama, opt for false lashes that have longer fibers in the center to complement the halo effect.
Halo Eyeshadow Look Ideas:
- Soft Neutral Halo:
- Use taupe or brown shades for the inner and outer corners and a champagne shimmer in the center.
- Perfect for an everyday, wearable halo look.
- Smoky Halo:
- Use deep grays or blacks for the inner and outer corners and a silver or gold metallic shade in the center.
- Ideal for a sultry evening look.
- Colorful Halo:
- Choose bold colors like purple, teal, or pink for the outer corners and a contrasting bright shade like yellow or white for the center.
- Great for festivals or special occasions.
- Cut-Crease Halo:
- After applying the dark shades, use concealer to carve out the center of the lid for a sharp, clean halo look.
- Apply a vibrant or metallic shade over the concealed area for a dramatic, precise finish.
Would you like suggestions for shades or brands to try out specific looks?
How To Choose The Right Eyeshadow
Choosing the right eyeshadow can be confusing, especially when several textures and shades like powder, creme, liquid, putty, jelly, and pastel colors are available on the market. Before you buy any of these on a whim, ask yourself the following questions:
- Is your eyelid oily? If yes, it is best to avoid cream and jelly eyeshadows.
- Do you have sensitive skin around the eyes? If your eyes tend to itch, become red, or water quickly, do not apply chunky glitter and neon eyeshadows.
- Do you have a few basic shades? It is a good idea to start with a few basic shades. Black, brown, and burgundy, as well as a base shade (matte pink and yellow, camel-toned colors) and a highlighter color (gold, champagne, and pearl), can help achieve various looks, such as a smokey eye makeup look, cut crease, and party pop.
- Do pastel shades look chalky? Like it or not, pastel shades do not look flattering on all skin tones. They can appear chalky, and the color may not be visible at all. The trick is going from mid-range to higher-end pastel eyeshadows. You consult a makeup advisor to find the pastel shades that best suit your skin tone.
- Cool or warm tones – what looks better? What’s your undertone – cool, warm, or neutral? If you have a warm undertone, go for warm eyeshadows with yellow, orange, warm-toned pink, green, and brown hues. For a cool undertone, eyeshadows with blue undertones are ideal. Neutral undertone eyeshadows can be worn by everybody.
- What’s the occasion? For parties, choose glitter, shimmer, or bold/neon colors. For work or school, pastels and muted neutral shades look better.
Quick Tips to Apply Eyeshadow Perfectly
- To define the crease area, use a pencil brush and blend it with a fluffy brush.
- You can use cream eyeshadows as a base for powder eyeshadows.
- Apply eyeliner to your eyelids to create a base for green, blue, and gold eyeshadows to pop more.
- Use a setting spray to wet your eyeshadow brush if you are working with metallic eyeshadows.
- Apply glitter eyeshadows with your fingers for a better payoff.
- If you have trouble drawing the ‘V’ on the outer corner of your eyes, draw a ‘#’ with an eye pencil instead and blend it immediately to avoid stark edges.
- To avoid eyeshadow fallout, powder the area under your eyes with a transparent or translucent powder before beginning the eye makeup. Once you are done, simply sweep off the powder.
- You can also conceal your under-eyes after doing your eye makeup.
- Use clean brushes to blend two colors for the best transition effect.
- It is always good to finish your eye makeup first and then move on to your base makeup. That way, if there is any eyeshadow fallout under or around your eyes, you can quickly clean it up without spoiling your base makeup.
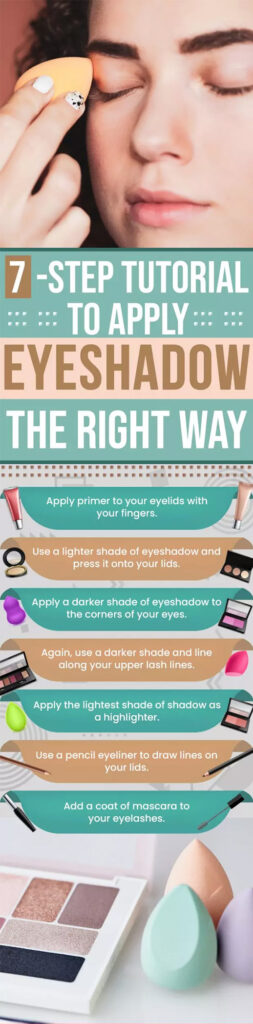
Infographic: 7-Step Tutorial To Apply Eyeshadow The Right Way
Learning how to apply eyeshadow the right way can define your eyes and elevate your look. It can add a lot of depth to your eyes, and the magic lies in getting the basics right. In the infographic below, we have listed down the steps to apply your eyeshadow like a professional. Take a look.
Eyeshadows are an essential part of eye makeup. They tell a lot about your personality and moods. No matter the shape, size, and type of your lids, as you keep experimenting with the art of shading your lids, you will learn to recognize which techniques work best for your eyes. So, why delay any further? Go! Get yourself a palette, and some eyeshadow brushes, and get down to business with this simple eyeshadow tutorial. Flaunt your skills and stunning eyes the next time you and your friends meet up.
Frequently Asked Questions
- Is it okay to wear eyeshadow without eyeliner?
Yes, it is okay and even trendy these days to wear eyeshadow without eyeliner. However, eyeliners can help the eyes and the eye makeup pop better. Whether you choose to wear it or not may depend on the kind of look you want to achieve.
2. Can you use Vaseline as eyeshadow primer?
Yes, you can use Vaseline as an eyeshadow primer. It particularly works well with eyeshadow palettes which have low pigmentation.
3. Can I use red lipstick as eyeshadow?
Yes, red lipstick can be used as eyeshadow. It not only goes well with all skin types but can help you achieve a high-fashion and glamorous look if done well. You can dab lipstick on your finger and apply it on your eyelids in circular motions and blend it out well. However, it can transfer and smudge.
4. Is it weird to wear eyeshadow without mascara?
No, it is not weird to avoid mascara after wearing eyeshadow. However, putting on mascara at the end helps lift up the lashes and make them look prominent, giving a more defined look to your eye makeup. Otherwise, the eyelashes may look a little lifeless and dull.
Key Takeaways
- An eyeshadow can turn up the heat in your makeup game.
- To achieve the desired results, you will need some primer, different eyeshadow colors, a brush, a liner, false eyelashes, and mascara.
- You can also learn to apply eyeshadow on hooded eyes using the cut crease technique.
- You need to consider a few factors when choosing an eyeshadow, like your eyeshadow consistency, finish, colors, and skin tone and type.
Personal Experience:
Getmakeup;s articles are interwoven with authentic personal narratives that provide depth and resonance to our content. Below are the sources of the personal accounts referenced in this article.